
Seeing Beyond Colors – 10 Pro Tips for Black and White Silhouette Photography
Black and white silhouette photography is a timeless and captivating art form that has stood the test of time. By removing color and focusing on the interplay between light and shadow, photographers can create stunning and dramatic images that showcase the beauty of simplicity.
You can easily master this techniques once you understand the main principals behind creating a good silhouette photo and put some time into the practice.
In this article, I will share with you my 10 top tips for creating black and white silhouette photos, so you can elevate your photography skills and capture unique silhouette images.
10 Pro Tips for Black and White Silhouette Photos
- Find the light for black & white silhouette.
- Choose the right subject for B&W silhouette.
- Use manual mode and spot metering.
- Consider the background.
- Experiment with contrast.
- Shoot up or down for a different perspective.
- Look for the streaks of light.
- Pay Attention to Composition.
- Use natural elements to create a visual frame.
- Use editing software.
What is a silhouette in photography?
In photography, a silhouette is a dark outline of a subject against a brighter background.
It is created by placing the subject in front of a light source, such as the sun, moon, or any strong artificial light, but with little to no illumination in front of the subject – definitely no flash.
With the right lighting, subject, and composition, you can create stunning black and white silhouette photos that tell a story and evoke emotion.
Silhouette – solid dark shape of a subject on a much brighter background.
Silhouettes are one of my favourite creative techniques. If you would like to learn more about How to achieve a silhouette in photography? – make sure to read my previous blog post – Top 10 Silhouette Photo Ideas with Photography Examples.
And if you like shooting in colour – make sure you see stunning examples in the 15 Silhouette Photography Ideas – Colours, Shapes and Shadows
What makes a good black and white photograph?
Black and white photography is the art of using different tones of gray, ranging from white to dark, to create compelling images. A well-captured black and white photograph is indicative of a high-quality image, regardless of its color or subject matter. There are several essential elements of top-notch black and white photographs, including high contrast, texture, and interesting shapes.
When shooting black and white photos, it is important to start with the right settings. Keep your aperture and ISO settings as low as possible to avoid any graininess or noise, which can take away from the dramatic impact you’re creating by shooting in black and white.

Black and white photography uses gray tones to create compelling images.
In color photography, we can control the viewer’s eyes and emotions with color, but in black and white photos, we only have light to dark tones. Finding shapes in your image as well as textures and contrast will help you to lead the viewer’s eyes around your image. Look for images that provide high contrast, such as a portrait set against a shaded background or dark hills against a bright sky. Use texture as another way to express your vision.
Ultimately, a good black and white photo is one that has a reason for being black and white. Often, black and white is the best solution to convey a certain mood or emotion. However, there will be times when the colors in a landscape are perfectly fine, but the image still looks better in black and white. As a photographer, it is important to understand what makes a good black and white photograph so that your images exude a more intense and dramatic feel.
Recommended reading on Black & White Photography
Improve your skills and expand your knowledge by diving deeper into black & white photography with books, which provide in-depth knowledge and insights that cannot be found in a quick online search or tutorial.


Before we look at the images, I want to shout HUGE THANKS to all the talented photographers who submitted their fantastic pictures to Unsplash. Thanks to your contributions, I was able to showcase some of the best examples of silhouette photography in this tutorial.
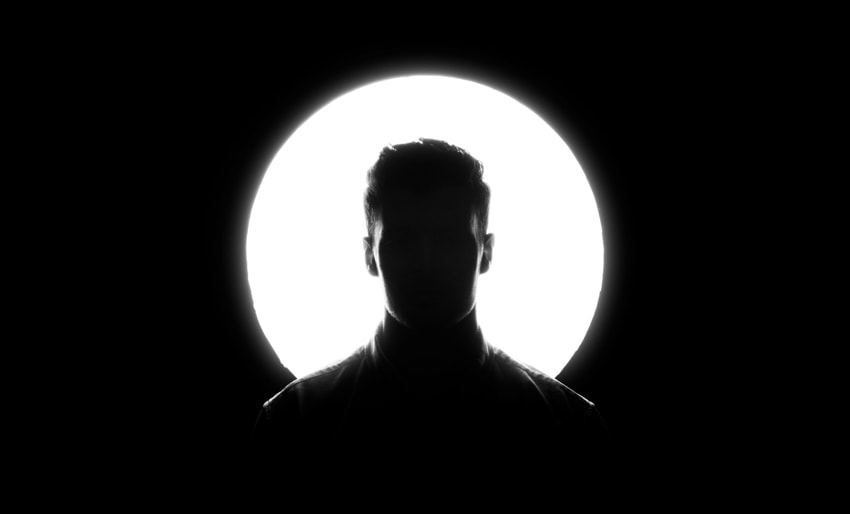
1. Find the light for black & white silhouette photography.
Good lighting is essential for creating compelling black and white silhouette photos. Without light, there is no contrast, and without strong contrast, there is no silhouette.
While many photographers recommend shooting during the golden hour – the hour just after sunrise or just before sunset – I believe that any time of day can work. Personally, I prefer to use harsh lighting for a more dramatic effect that makes the silhouette stand out.
One useful technique is back-lighting, where the light comes from behind the subject to create a striking and defined outline, perfect for creating stunning silhouettes.
Generally, whenever you want to try to create this effect indoors or outdoors, look for any sources of light – windows, doorways, sun, torch, etc.


2. Choose the right subject for B&W silhouette.
Choosing the right subject is another crucial factor in creating a good silhouette. Look for subjects with strong and recognizable shapes that can be easily identified in silhouette. For example, trees, animals, and people in certain poses can make great silhouettes.
Keep in mind that the background plays a significant role as well. Consider how it can provide contrast to the subject and make it stand out even more. For example, a bright sky or a colorful sunset can make for an excellent background for a dark subject monochrome silhouette.


3. Use manual mode and spot metering.
What settings should I use for black and white silhouette photography?
If you have time to set up the picture, use manual mode – M. Only this mode can give you complete control over your camera and the exposure settings.
However, often, there is just no time, you see something and you must capture it – NOW! Thus 75% of the time I use aperture or shutter speed priority. This works so much quicker. You just think about the creative effect you want – and you shoot! Unfortunately, most of the time the camera will give me a picture that is too bright for my liking – to fix it I use exposure compensation, around -2 or -3.
Another helpful camera setting for creating a silhouette is – metering! While most cameras are set by default on matrix/evaluative metering modes, spot metering is a great option to use when taking silhouette photos. To quickly get the perfect reading for a silhouette, meter for the brightest part of your image, which will be the background. On my Nikon D750 I also have a highlights-priority mode and this is the mode I use the most when creating silhouette images. If you shoot outdoors – just point the camera at the sky and you get perfect reading for the silhouette. Remember it, use the exposure lock button, refocus on your subject, and shoot!
Please note – there is no one setting for a silhouette. The exact camera settings will vary depending on your subject, lighting, and most importantly your creative vision.


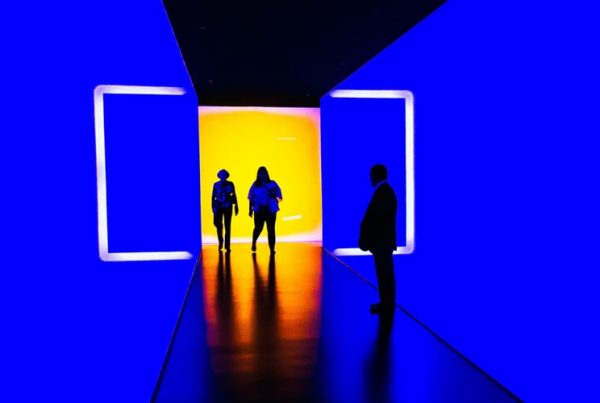
4. Consider the background.
When shooting silhouette photos, it’s important to pay attention to the background. After all, the contrast between the subject and the background is what makes the silhouette stand out.
One way to create a visually striking silhouette is to use negative space. Negative space refers to the empty space around the subject, and using it effectively can draw the viewer’s attention directly to the subject.
To use negative space, look for a background that is clean and simple, with no distracting elements. This could be a clear sky, pavement, a plain wall, or even the horizon. By placing the subject against this simple background, you can create a strong visual contrast and draw the viewer’s attention to the subject.
Finding good background for black and white silhouette photography.
In addition to negative space, you can also look for other elements in the background that can add interest or context to your silhouette photo. For example, you could position the subject in front of a recognizable landmark, or use the shapes of trees or buildings to create interesting patterns around the silhouette. Look for windows, doorways, alleyways, cove walkways, arches…
By considering the background when shooting silhouette photos, you can create images that are not only visually striking but also tell a compelling visual story.


5. Experiment with contrast.
How do you take high contrast black and white photos?
Contrast is a powerful tool in black and white photography. High contrast can add drama and intensity to your image, while low contrast can create a more peaceful and subdued mood. Consider the subject and the effect you want to achieve, and adjust your settings accordingly.
To increase contrast, you can increase the difference between the light and dark areas in your image. This can be done in-camera by using a higher contrast setting, or in post-processing by adjusting the levels or curves. Be careful not to overdo it, as this can result in an unnatural or harsh-looking image.
Conversely, to decrease contrast, you can decrease the difference between light and dark areas. This can be achieved by using a lower contrast setting in-camera, or by adjusting the levels or curves in post-processing. A low-contrast image can be especially effective when paired with a soft subject or a dreamy atmosphere.


6. Shoot up or down for a different perspective.
Getting low, very low will help you create a clean and uncluttered background, which will draw attention to your subject and make it stand out. Getting low can also create a more dynamic composition and add a sense of depth to the image. Experiment with different angles and heights to find the most interesting perspective.
Additionally, if you’re shooting outdoors, getting low can also allow you to capture the sky or the ground as the background, which can add more visual interest to your image.
Shooting silhouettes by taking a camera higher and shooting down can be a great way to capture interesting shadows and reflections. When shooting from a higher perspective, you can create a more unique and abstract image.
This technique works particularly well when photographing subjects such as people or buildings, as the shadows they cast can create interesting shapes and patterns on the ground. You can also look for reflective surfaces, such as puddles or mirrors, to capture the reflection of your subject in the shot.
By experimenting with different angles and perspectives, you can create visually striking and dynamic images that stand out from the norm.


7. Look for the streaks of light.
One of the most exciting aspects of silhouette photography is the opportunity to capture striking light patterns. Look for sources of light that can create interesting streaks or beams. This can include anything from the sun shining through trees or buildings, to streetlights or car headlights.
These light patterns can add an extra dimension to your silhouette photos, creating a more dynamic and eye-catching image. To capture them, experiment with different angles and perspectives, and try shooting during different times of the day. You may find that some light patterns are only visible at certain times, such as during the golden hour or at night.
Keep in mind that capturing these light patterns may require some additional adjustments to your camera settings. You may need to adjust your exposure time or use a different aperture to capture the light streaks without overexposing/underexposing the rest of the image.


8. Pay Attention to Composition.
Composition and framing are essential components of any photograph, including silhouette images. Consider using the rule of thirds to create a balanced and interesting composition. With this rule, you divide the frame into thirds, both horizontally and vertically, and place the subject or the point of interest along these lines or where they intersect. This technique adds more depth and visual interest to the image.
Additionally, don’t be afraid to experiment with different angles and perspectives. Try shooting from a low angle, from above, or from different sides to find the best composition for your subject. By doing so, you can create unique and captivating silhouette images.


9. Use natural elements to create a visual frame.
Enhance the composition of your photos by using the frame within a frame technique. Look for natural elements like trees, arches, or doorways that can be used to encircle your subject, adding depth and dimension to your shots. This technique can draw the viewer’s attention toward your subject and create a visually balanced composition. Be mindful of the placement of your subject within the frame, and experiment with different shapes and styles of framing to add interest and variety to your images.


10. Use editing software.
To take your black-and-white silhouette images to the next level, don’t be afraid to use editing software to enhance and refine your images. Here are a few things you can do:
Adjust the exposure
Use editing software like Adobe Photoshop or Lightroom to make adjustments to exposure, highlights, whites, shadows and blacks. These are essential adjustments that can greatly improve the overall look and feel of your image. Play around with the sliders until you achieve the desired effect.
Below is an image that I took while waiting for the sunrise. I used manual mode and underexposed it at -2. But this wasn’t enough, and you can still see some details. So I tweaked it using exposure sliders to make the silhouette effect more pronounced.


Convert the image to black and white
While shooting in black and white is ideal, you can also convert your colour image to black and white in post-processing. This can give your image a classic and timeless look and can also help to emphasize the silhouette effect further.

Original colour version

Edited Black & White version
Remember, editing is all about enhancing and refining the image, not completely altering it. So, use these techniques sparingly and only make adjustments that will improve the overall look and feel of the image.
Conclusion
Silhouette photography is such a beautiful and creative way to capture stunning images that truly tell a story and evoke emotions. I’ve shared some tips and ideas in this post that can help take your black and white silhouette photography to the next level. By following these tips, you can create images that stand out and showcase your unique artistic style.
If you’re looking for inspiration, I invite you to check out my Black and White Silhouette Photography Gallery on Unsplash. It’s a carefully curated collection of images that showcase the power and beauty of this unique technique.
If you have any questions or feedback, please don’t hesitate to reach out to me. I’m always happy to help and share my knowledge with other passionate photographers.
Thanks for stopping by, and happy shooting!
