Best Examples of Silhouette Photography with Tips and 10 Photo Ideas
Silhouette photo ideas is the first post in the Creative Techniques series, which I hope will inspire you to start making your images = taking more thought-out pictures.
Artists, filmmakers and photographers have used silhouettes for decades, and there are many incredible examples in paintings, drawings, movies and photographs.
In photography, technically, silhouetting is one of the easiest to master, but the one most visually interesting and compelling.
As you build the scene, silhouettes will help you to remove distractions. By hiding the subject in the darks, you can convey a sense of mystery and drama, letting the viewers’ imagination fill in the details and complete the story.
“You don’t take a photograph, you make it.”
Silhouettes are one of my favourite creative photography techniques. If you are interested in learning how do you shoot a silhouette photo? and what settings you should use for silhouette photography? Read on! Here, to inspire you, I am sharing my top 10 silhouette photo ideas and examples of silhouette photography.
Top 10 Silhouette Photo Ideas
- Beach Sunset silhouette photography.
- Kids silhouette photo ideas.
- Silhouette for Couples and wedding photography.
- Sun in silhouette photos.
- Using Windows for silhouette photography.
- Architecture silhouette photography ideas.
- Trees in silhouette photography.
- Birds silhouette photography art.
- Silhouette art technique – Frame within the frame.
- Using Strobe and Lights for silhouette photography.
What is a silhouette?
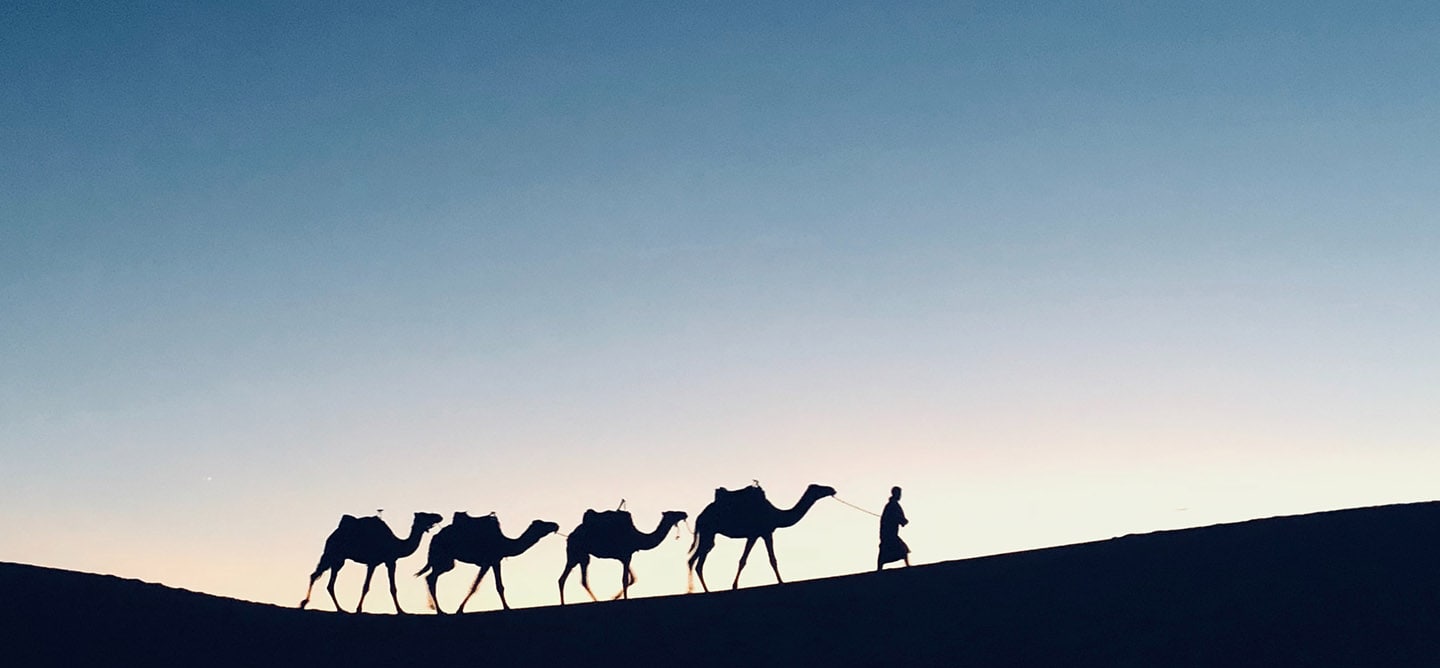
A silhouette is a solid dark shape of a subject, presented on a much brighter background.
The first silhouettes were made in a form of a drawn sketch and paper cut out. They originated in France around the 1850s as a cheaper alternative to having a painted portrait.

Silhouette – solid dark shape of a subject on a much brighter background.
How is a silhouette created?
An essential ingredient for a silhouette is a strong light source, powerful enough to create high contrast between the subject and the background. The position is equally important – the source of bright light should be directly behind or slightly to the side of the subject. Because the bright light will be coming from behind, the front of the subject will be “in the shadows”, making it look dark or entirely black.
The silhouette effect in photography will not happen if the light comes from the front or is not powerful enough to create high contrast.

Backlighting creates strong contrast

Front light won’t create silhouettes
How to achieve a silhouette in photography?
As I am sure you know, lighting is everything in photography!
The perfect time of the day to create the silhouette effect is a sunrise or a sunset, the most picturesque being the golden and blue hours. If you shoot outdoors, look around for bright areas. Sky, water, a bright wall or a doorway may be the perfect canvas. Indoors – big windows are your best friend. Remember to place your subject directly in front of the bright background.

Silhouette effect during golden hour

Silhouette effect during blue hour
What settings should I use for silhouette photography?
Technically, there should be at least a few stops of light difference between the background (bright) and the subject (dark).
The quickest way to do it is to use spot metering and measure the exposure from the bright areas (e.g. sky). You may also use matrix (Nikon)/evaluative (Canon) metering, as long as the subject is relatively small on a large bright background.
If you have time to set up the camera, use fully manual mode (M). First, think about the creative effect that you want to achieve (e.g. freezing the action or creating motion blur) and fix your first variable (e.g. shutter speed). Next, adjust your other settings to get the correct exposure (e.g. aperture, ISO), but remember to set the exposure for your background – not the subject.

I wanted to make a summer portrait of my daughter enjoying the seaside. In order to create the silhouette effect, I positioned myself facing the sun and exposed the image for the sky, giving priority to the super-fast shutter to “freeze the water”. Settings: shutter speed = 1/3200 to capture the action, aperture = f/5 to soften the background, ISO = 200 for the best quality.
When I travel, I find aperture priority (A/Av) and shutter speed priority (S/Tv) much quicker to use. But I tend to set the exposure compensation to -2 or -3 to have the silhouette effect a bit stronger. Or I just leave it as is, but adjust the image in post-production in Adobe Lightroom or Photoshop by dragging blacks and shadows to more negative values.
Recommended Reading on Photography
Improve your skills and expand your knowledge by diving deeper into creative photography with books, which provide in-depth knowledge and insights that cannot be found in a quick online search or tutorial.


Before we look at the images, I want to shout HUGE THANKS to all the talented photographers who submitted their fantastic pictures to Unsplash. Thanks to your contributions, I was able to showcase some of the best examples of silhouette photography in this tutorial.
1. Beach sunset silhouette photo ideas.
One of the most popular settings for silhouette photography is the beach at sunset. With its stunning colors and dramatic scenery, the beach offers endless possibilities for creating breathtaking silhouette photos.
Some ideas to consider include capturing the silhouettes of people playing in the water or strolling along the shoreline, using beach umbrellas or palm trees as foreground elements, or using the sun as a graphic element.
Remember to experiment with different camera angles and exposure settings to create unique and eye-catching effects.


2. Kids silhouette photography examples.
Have the camera with you at all times if you want to capture these unique moments and create long-lasting memories. Remember – opportunity never waits!
A few tips?
- Set the shutter speed a bit faster – kids move all the time!
- Use a long zoom and give children some space to play, be less intrusive.
- Photograph children at their level to create a more natural perspective – not from the top.
- Be prepared by having an image in your mind. Act fast, children get bored quickly.
- Be flexible, show your child the test image you just took, explain what you want to achieve, listen to their ideas – cooperate 🙂


3. Couples – romantic silhouette photo ideas for engagements or a wedding.
There is nothing more romantic than an evening photo shoot on the beach. Sea, sand, golden sky… But you can create silhouettes everywhere – all you need to do is look for the light. Great weather that’s like half of the success. To have more chances for a successful photoshoot, use apps like Golden Hour One, Clear Outside or PhotoPills, to check what time will be the sunset, the golden and blue hours, the direction where the sun will be setting, the chances of rain, wind, clouds etc…


4. Creative ways to use the Sun in pictures.
Important! Don’t point your camera at the sun unless you are photographing a sunset or sunrise – and still be mindful! You don’t want to damage your eyes.
Forced perspective is one of the funniest techniques. It is an optical illusion that can make objects appear larger or smaller, closer or farther away than they really are. You can pretend to be holding the sun, use it as a ball, make it a light in a lantern… have fun!


5. Trees as art silhouettes.
Most of the time we see trees as they are… green. The silhouette technique can accentuate specific features or bring attention to a certain part of the tree. Use a wide angle lens like 14-16-24mm to actually show the whole tree, or zoom in to concentrate on details. Shoot up to include as much sky as possible.


6. Birds – silhouette photography ideas.
If you have enough typical colourful photos of birds in your portfolio – it’s time to spice things up a little. Silhouettes will help you to remove distractions. Ok, we will lose the colours of the feathers, but pictures of birds looking as silhouettes look very artistic and visually different.


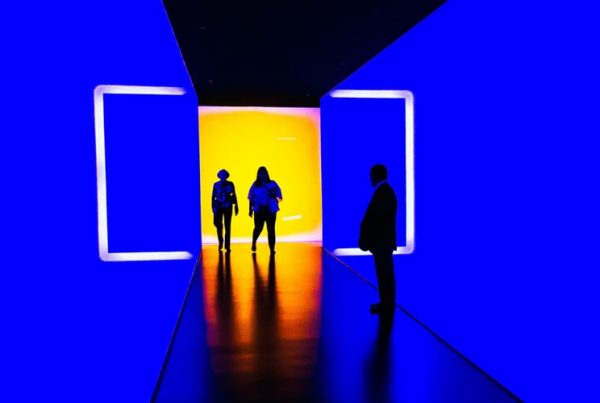
7. Add a border – “frame within the frame”.
Frame within a frame in photography is a very popular composition technique. It is achieved by bordering your subject with some strong visual features within the scene. Often a doorway or a window, arch, rocks, anything really, as long as it creates an extra frame around your subject.


8. Windows – silhouette photo ideas.
Windows act as natural frames and can make your pictures more interesting through their unique visual design. But be mindful of any extra elements like pots, wires, lamps etc.. as everything in front of the bright window will become a dark shaped silhouette.


9. Buildings and Architecture.
When photographing buildings and architecture, especially creating silhouette effects, look for lines, shapes, and patterns. A flexible zoom lens like 24-120mm or 18-200mm will be your best companion. At 18-24mm you might be able to fit the whole building or cityscape, and if you zoom in to 120-200mm you can frame just a section of a building to show shapes as silhouettes.


10. Strobe, neon and flash lights.
These days there are tons of gadgets at your disposal. Flash guns are very powerful and super easy to use – all you’ll need is a remote trigger. Put the light behind your subject and experiment with different power outputs.
Concerts are superb for trying shooting silhouettes. Often producers will use colourful laser lights and smoke machines. The effects are visually stunning.


Bonus – Fire and flames silhouette photo ideas.
Expose the image for the bright flames – not the subject. Switch off the flash. Move around to position yourself so that the subject will be in front of the fire.


Extra Bonus – Silhouettes in movies.
The silhouette effect is used not only in photography but also in movies. The clip below shows how Roger Deakins uses silhouettes in his movies to set an atmosphere, add drama and evoke emotions.

Conclusion
Silhouette photography is a beautiful and creative way to capture stunning images that evoke emotion and tell a story. By following the tips and ideas shared in this post, you can take your silhouette photography to the next level and create images that truly stand out.
To see more stunning photographs using silhouette effects, please check out my Silhouette Gallery on Unsplash. There, you’ll find a carefully curated collection of images demonstrating this unique technique’s power and beauty.
I hope you found this post helpful and informative. If you have any questions or feedback, please don’t hesitate to reach out to me.
Thanks for stopping by, and happy shooting!

